Before having my own C-section recovery to navigate through, I’d been helping many folks work through theirs.
One of the most important steps we can take in C-section recovery is taking care of the scar itself. This goes beyond just letting the wound itself heal.
The incision is so many layers of tissue deep – a lot has happened to the body. If those tissues are not adequately taken care of we can experience issues that you might not even realize are linked to your scar and how it functions.
I’ll preface this by saying I’m not a massage therapist, I don’t work on scar tissue, it is NOT my area of expertise. I would highly recommend seeing a registered massage therapist, a physiotherapist, an acupuncturist, or other body worker who can teach you more about scar massage.
That being said, I’ve been educated in very basic scar tissue massage techniques for C-section recovery and think it could be helpful for you, so want to pass the information on. Especially since this information has likely NOT been passed on to you from your healthcare professionals after your surgery.
At my 5-week postpartum appointment with my pelvic floor physiotherapist (Gayle Hulme in Calgary at Lakeview Physiotherapy), one the things I was most excited about was learning how to do some manipulation on my scar.
Why Would We Do Scar Massage?
Issues you might be feeling after a C-section go far beyond the sensations of the scar itself. Other symptoms you may be experiencing related to the surgery and let us know the scar could use treatment are:
- pain during sex
- clitoral and/or labial pain
- feeling like you need to go pee A LOT
- numbness around the scar
- lumpy or hard spots over/around the scar
- feeling of tightness or rigidity around the scar
- tenderness around the scar
- pelvic pain, lower back pain, pain in the groin
- you can’t feel your abdominals doing work!
- struggles with infertility after a previous C-section
- digestive troubles, IBS
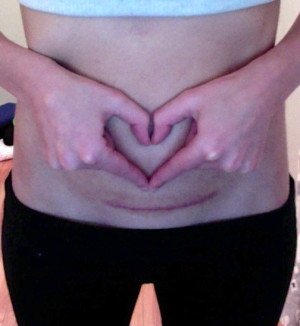
Any of those sound familiar? Remember that the scar is not just what we can see. It extends into the body much further than the surface appearance. Scar tissue forms after the procedure to replace normal tissues.
It’s not laid down as “neatly” and is less pliable/flexible.
There can be adhesions that occur from this scar tissue to surrounding areas. The scar tissue can attach, or adhere, itself to skin, muscles, connective tissues. This is why there can be issues after C-sections to the abdominal, trunk, and pelvic regions.
When Should You Start C-Section Scar Massage?
The general guideline is to start around the 6-week postpartum mark. At that first appointment with my physio at 5 weeks postpartum I asked her, “Can I touch it now?”, because I wasn’t really sure if it had fully healed well, especially after it was infected.
But, she reassured me that indeed it was well healed and I could start working on it, so I did then. I likely could have started earlier without issue, but if you’re not sure, you might want your doc to take a look at your 6-week postpartum check up and give you the go ahead.
IT’S NEVER TOO LATE to start scar massage. If you’ve had a C-section, ever, I would start now.
How Do We Do Scar Massage?
Again, this is how I have been taught to do scar massage and what’s working for me. This is what I prescribe to my coaching clients. This is NOT by any means the be all, end all to C-section scar massage.
I use coconut oil to do my massage work. Any oil should do though (almond, olive, etc).
[NOTE from Marjorie Brook, Massage Therapist: Never use Vitamin E oil on fresh wounds, even at 6 weeks, it actually retards healing by as much as 50% and about 15% of pop is actually allergic and do not know it.]
I recommend starting gently and over time increasing your pressure used. You don’t need to be aggressive to have results. Slight discomfort as your sensation is ok.
4-Minute C-Section Scar Massage Routine
HERE IS A VIDEO DEMO TO SHOW YOU THE FOLLOWING 4 MOVEMENTS:
Step 1: Right to Left
Start from the right side of your scar and with smooth strokes, run your 3 middle fingers from the right side, all the way through to the left side of the scar. You can start with the tissue above and below the scar itself, and then once the sensitivity decreases move directly over top of the scar.
Do this for 1 minute.
Step 2: Left to Right
Start from the left side of your side and with smooth strokes run your 3 middle fingers from the left side, all the way through to the right side of the scar. Again, you can start with the tissue above and below the scar itself and once the sensitivity decreases move directly over top of the scar.
Do this for 1 minute.
Step 3: Pressure + Wiggle
Start on the right side of your scar and place your 3 middle fingers directly over top of the scar or slightly underneath it. Press down into your belly and keeping that pressure on the tissues, shift the pressure forwards and backwards a small amount each direction. Almost like you’re wiggling the scar back and forth.
Repeat this downward pressure + wiggle all along the scar until you reach the left side and then work your way back to the right side.
Do this for 1 minute.
Step 4: Circles
No set pattern here. Move in a circular motion all around the lower belly and pelvic region. Inside the hip bones, up to the belly button, over and around the scar.
Do this for 1 minute.
You’re done!
How Often?
For the first 2 weeks after I started practicing, I did the massage everyday.
For the next 2 weeks, I did the massage every second day.
Now, I do the massage a couple of times per week or when it is feeling sensitive.
I really hope this helps!
Jess
Ps. Start your 8-Week C-Section Return To Exercise Program Here.